
As an Amazon affiliate, we earn a commision from qualifying purchases.
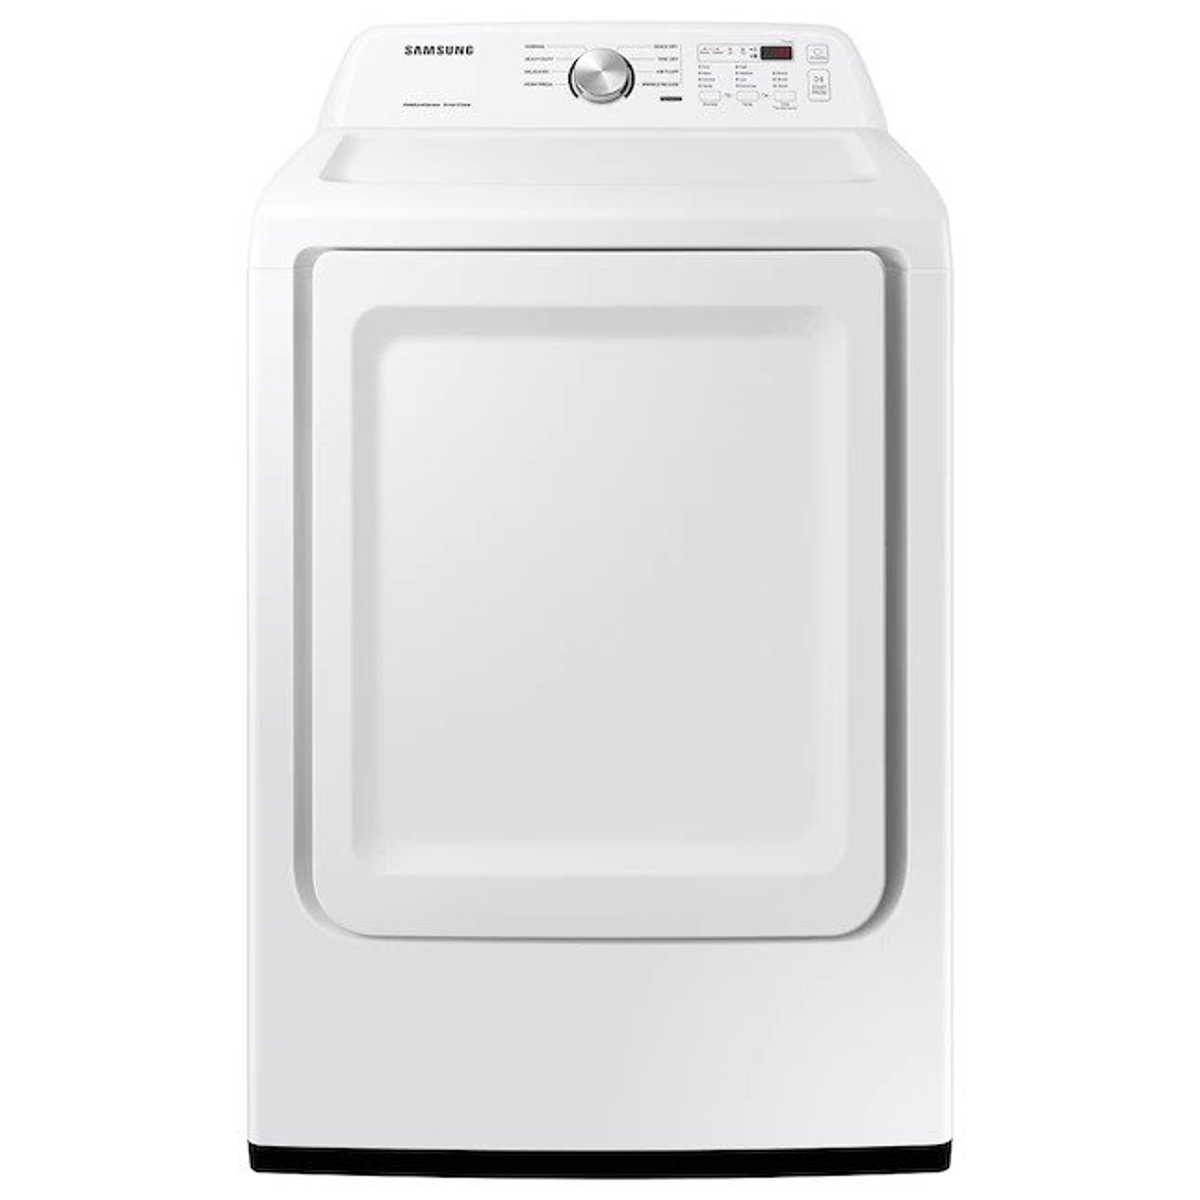
Your dryer making loud rumbling noise? try these fixes
If your dryer suddenly starts making weird noises, you will obviously get concerned and rightly so- because it could be a sign that some part is not functioning properly(whuch could lead to drying problems).
Note that dryers make a range of noises when a part is faulty including squealing, buzzing, scraping, and even rumbling sounds.
In this article, we shall be looking at how to fix your if it is making a loud rumbling noise.
Dryer making loud rumbling noise – How to fix the terrible noise
Basic fixes:
Make sure your dryer is level
Just try to move it a bit and see if it will help.
Clean the dryer blower wheel fan
The next possibility is you might be looking at clumps of lint stuck on your dryer’s blower wheel fan, making the wheel go off balance(when it is in high running speed, which in turn causes terrible vibration/rumbling noise issue).
Here you have to access the blower wheel to clean out the clumps of lint on the fan(The blower wheel should be on the motor’s shaft- your owners manual should help you locate it).
Watch how to clean blower fan on Whirlpool Dryers below
Dryer making loud rumbling noise – most common fix
Now, a dryer that makes loud rumbling noise is usually a sign of either a worn-out drum roller(the rollers support the drum as it rotates) or drum roller axles(the axles help the rollers stay and roll in place).
Indeed, both parts could be worn out(This is likely the case if your dryer is making horribly loud rumbling noises every few seconds when running or the noise is consistent throughout the cycle).
That being so, you might need to replace the damaged part(s).
But, before this, we need to first identify which of the two parts needs to be replaced.
To do that, follow these steps:
- Unplug your dryer from the power outlet. If it is a gas dryer, be sure to disconnect it from the gas supply.
- Unscrew the top panel screws and remove the panel.
- Follow this by depressing the tabs on the control panel and carefully remove it.
- Remove the screws on the control bracket and put the bracket aside.
- If your dryer has a printed control board, disconnect the wire harnesses its connected to and remove the control board.
Quick tip: you might want to take a picture of the wire connections going to the printed control board and control panel for easier reassembling.
- Next, unscrew the screws at the base of your dryer.
- You can now pull out the lower panel.
- Now, reach into the lower cabinet below your drum and locate the wire harnesses of the door switch and moisture sensors. Disconnect both harnesses.
- Remove the screws at the bottom and the top of the front panel.
- Now, to release the front panel, remove the mounting screws located inside the door.
- If yours has the blower housing at the front, make sure to remove those screws.
- Remove the screws holding the bulkhead mounting in place. Now lift the bulkhead off and set it aside.
- Depress the pulley to release the tension on the dryer belt. Follow this by unthreading the belt from the motor shaft and the pulley.
- Using the belt, lift the drum out of the dryer and put it aside.
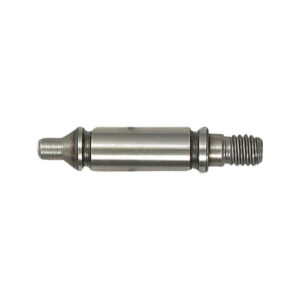
- You are now in a position to inspect the drum roller and their axles. They should look like the ones below respectively:
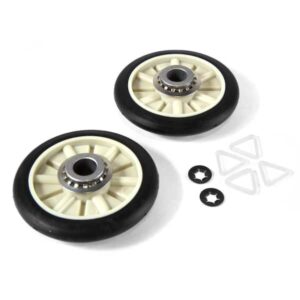
Note: most models will have 2 drum support rollers which are located at the back. However, some dryer models will have an additional 2 rollers at the front.
- Release the ring at the front of the roller and slide your roller off the shaft.
- Carefully examine the rollers for any signs of damage or wearing out. If so, you will need to replace all of the rollers. You see, a faulty roller indicates that the other rollers are highly likely to wear out pretty soon.
We recommend the Upgraded Samsung dryer repair kit. It is compatible with a wide range of Samsung dryers. However, if you are using a different model, you may want to try the repair kits here
- While at it, also check the state of the axles. If they are in good condition, then, all you need to do is to clean them for reusing.
However, if they appear to be worn out, they will also require to be replaced. If yours is a Samsung model, we still recommend the aforementioned dryer repair kit (otherwise try the repair kits here)
- If the axles are worn out, remove the back ring and using the necessary screwdriver, unmount the roller axles. Install the new axles and slide in the back ring.
- Now, to install the new drum support rollers, slide them into the cleaned axle and slide in the front ring.
Note: If replacing the rollers, remember to replace all of them. The same applies for the axles. This acts as a preventative measure. After all, the kit comes with 4 rollers and 4 axles.
- Next, align the rims of the drum to your rollers and loop the belt around the pulley and motor shaft in a zig-zag manner. Ensure you rotate the drum as this helps align the belt correctly.
- Reassemble the rest of the dryer.
Samsung dryer making loud rumbling noise – Frequently Asked Questions (FAQs)
What if the drum support rollers and axles are fine?
In such situations, you should consider checking your idler pulley for signs of wear(This is typically caused by the dryer belt eating through the pulley).
If this happens to be the case, then you will need to change out both the idler pulley and the belt.
However, you don’t necessarily have to buy a replacement idler pulley since most dryer repair kits also comes with an idler pulley and a dyer belt.
Dryer making loud rumbling noise – final words
As we wind up, I would like to remind you never to overload your dryer.
Why?
Well, because overloading it will result in additional weight being exerted on the axles and rollers.
And that’s bad as it increases their rate of wearing out.
Also, make sure not to put dripping clothes in your dryer as this also pressurizes the rollers and axles(again due to additional weight).
ALSO:
Dryer taking multiple cycles to dry [Fixed]
Dryer shuts off after 2 minutes [Fixed!]
Samsung dryer stops early [Fixed]
LG dryer won’t turn off [Fixed!]
Your GE front load dryer not starting? Try this