
As an Amazon affiliate, we earn a commision from qualifying purchases.
On average, a dryer should fully dry your clothes in once cycle – which takes about 60 minutes (it can vary slightly depending on the size of the load and what you’re actually drying).
So if your dryer starts taking longer(and multiple cycles) to dry your clothes, then there’s a decent chance that something is wrong with it.
It can also be that you’re not operating it correctly..
Which brings me to what I want us to look at in this piece: troubleshooting/what to check when it comes to your dryer taking multiple cycles to dry.
Let’s dive in:
Dryer taking multiple cycles to dry- what to do if your dryer is taking several cycles to dry (both electric and gas dryers)
Check on the following if your dryer is taking multiple cycles to dry your clothes(assuming you’re sure you have selected the correct settings)..
Clean your exhaust vent
If your dryer is taking multiple cycles to dry, then there is a very high chance that you have a clogged exhaust vent..
Indeed, this is one of the most common causes of a dryer taking multiple cycles to dry.
Now, to clean your exhaust vent, simply follow the following steps:
- Disconnect your dryer from the vent.
- Locate where the vent exits the house. Remove the flap covering the exit point. This will give you clear access to the entire ductwork.
- To effectively clean the vent duct, a vent-cleaner brush can come in handy- and we recommend the 2-in-1 PetOde dryer cleaner kit because it is flexible and super easy to use. Moreover, it comes with segments that you can easily combine up to a length of 40 feet.
- Now, insert the vent brush into the duct and spin clockwise as you slowly push the vent brush towards the exit. If you have a power drill, you can use it to do the spinning.
Quick tip: if the outside exhaust vent is located higher than the dryer’s vent, you will want to clean from the outside as gravity will make your weak easier. The same applies if the inside vent is higher than the outside one.
- Use a vacuum cleaner to clean the lint that comes out plus the one on the brush.
- Repeat until there is no more lint remaining.
- You can now reattach your dryer and make sure to screw back the flap at the exit point of the vent (remember not covering the outside vent with a flap might result in a bird building its home there clogging back your vent again).
How often should I clean my dryer vent?
We recommend you clean your vent once per year.
This ensures your dryer runs efficiently.
Quick Tip: Could it be that your vent tube is too long? It can make the dryer have problems expelling the humid exhaust-leading to drying difficulties- so get behind the dryer and trim down the vent pipe a bit. Also remove any twists or turns.
Clean the lint filter
As clothes are tumbled in the drum, the resulting turbulence plus the high temperatures typically result in some clothes shedding fabrics.
Now, these fabrics tend to clog the lint filter over time, resulting in poor drying performance in most dryers.
So the next part you need to clean is this important filter.
How to clean the lint filter
To clean the lint filter, you will need to first remove it.
Just note that depending on your dryer model, the filter may either be located on the top panel or at the front of the drum(right below the door opening).
Of course, you need to check your dryer’s booklet(owners manual) if you are completely unsure of where to find it.
As regards cleaning, it’s pretty easy- simply remove the part (once you identify it) and just scrap off the accumulated fabrics.
In fact, you do not need any special tools- using your hands is good enough.
Quick Tip: You can as well wash your dryer’s filter screen using a soft brush+some little dish soap- it will get rid of any fabric softener residue(allowing airflow to increase)
There’s more cleaning to do
Now, while at it, make sure to also clean any lint that might be in the lint housing as it can also cause issues.
And here you could again find a lint brush quite helpful.
Quick Tip: You do not want to use water as wet lint is much harder to remove.
How often should I clean the lint filter?
As a general rule of thumb, you should clean your lint filter after drying every batch of clothes.
Why?
Well, it is made of a mesh which gets blocked much more easily than a dryer vent.
However, you should do a thorough cleaning annually.
Dryer not drying in one cycle? Clean the dryer’s internal air duct and blower wheel
For this step, you will need to first disconnect the dryer from the power(If you have a gas dryer, disconnect it from the gas outlet).
- Follow this by disconnecting it from the vent system and pulling it away from the wall. This gives you enough room to work on your dryer.
- Unscrew and remove the back panel. This allows you to access the airduct.
The airduct is that part that also acts as the blower housing-It is usually connected to the dryer’s vent.
If you are still unsure of the part we are talking about, it is the left metallic part below:
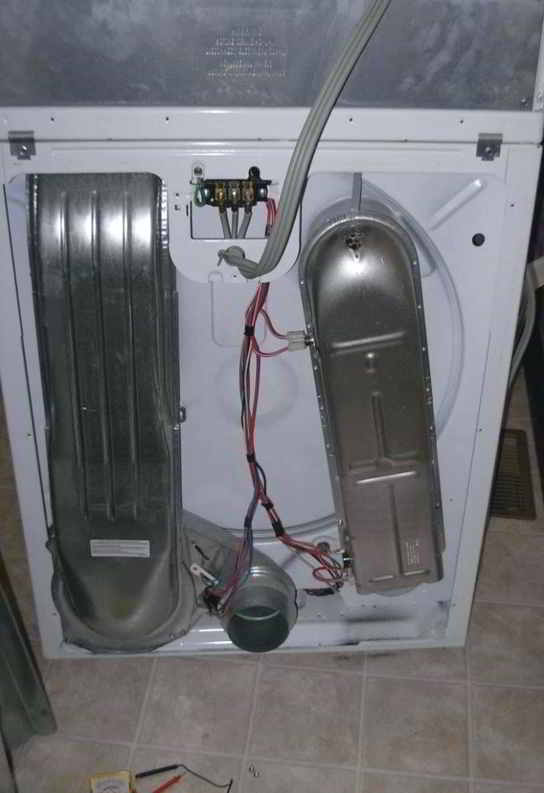
Note: some dryer models have their airduct at the front of the dryer so be sure to confirm from your manual about the location of your dryer’s internal airduct.
- Unscrew it and remove this duct. This is the path that your dryer uses to remove moisture.
- Remove any lint that may be on the blower wheel.
- Use a vacuum cleaner to clean the exhaust, blower wheel, and airduct.
- Now reassemble your dryer and see if it will resume drying properly
Dryer taking multiple cycles to dry – more repairs
Check the thermal fuse
If you have an electrical dryer, it might be the thermal fuse- it can blow and cause the fault.
Needless to say, a multimeter will be essential here.
ALSO READ: How to test the thermal fuse on a dryer
Check the moisture sensor
Trace the moisture sensor(it is typically two metal strips) and give it a few scrubs(with a scotch-brite pad).
ALSO READ: Samsung dryer moisture sensor test and Samsung moisture sensor dryer troubleshooting
Check the heating element
It’s additionally possible that the heating element is not producing enough heat so check it too.
Test the state of your cycling thermostat
When the cycling thermostat becomes faulty(it is responsible for regulating the internal temperatures inside your drum), your dryer can heat but start requiring multiple cycles to dry your clothes well.
This is because the thermostat will tend to lose continuity before its rated temperature is achieved and therefore cycle the heat off.
Don’t worry though- it is very easy to test and replace.
Simply follow these steps:
- Locate the thermostat-in most models, the cycling thermostat is located on the blower housing though in some models, it is found inside the airduct. Your thermostat should look like the one below:
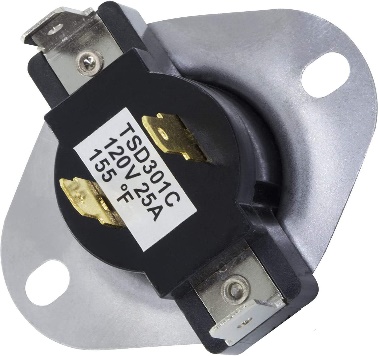
- Gently pull the metal connectors connected to it.
- Unscrew and remove the thermostat.
- Using a multimeter, test it for continuity.
Note: In this step, it should have continuity since your dryer is heating though it takes multiple cycles to dry clothes.
- For this step, we shall use a blow dryer and a digital thermometer. With the probes still connected to the terminals of your thermostat, gently heat its head with the blow dryer. Make sure that the thermometer is on the head of the thermostat.
- While doing this, keep checking on your multimeter to make sure that the thermostat still has continuity. Once the temperature exceeds the rated temperature on your thermostat, your thermostat should break continuity and you should stop heating.
Now, if the thermostat lost continuity before you arrived at its rated temperature, it is faulty and you will require replacing it.
Make sure to get a replacement that fits your model. When replacing it, just put it inside the old slot, tighten it with the original screws and reconnect the metal connectors.
- Reassemble your dryer.
Check the settings
Don’t forget to double check the settings- I’ve seen folks call for service when the issue is incorrect settings- it will surely take longer if you set your dryer to low heat.
Ensure you are not overloading your dryer
You see, overloading your dryer restricts proper air movement within the dryer drum.
This, in turn, impedes moisture removal from your damp clothes.
Therefore, at any given time, you will want to make sure that your dryer is at utmost ⅔ full.
Check your washing machine
A dryer is meant to dry moist clothes.
Therefore, if your washing machine is not fully dissipating water from the clothes, your dryer will take longer to dry your clothes.
Therefore, check the state of your clothes once you remove them from the washing machine.
If you note that they are excessively wet, make sure that the washer is set to a sufficient spin cycle.
In other words, it might be necessary to spin-cycle your wet clothes (a bit more) before you load them in the dryer (Clothes should never be sopping wet-when they’re going in).
And again make sure that you are not overloading your washing machine.
Dryer taking several cycles to dry – wrapping it up
99% of the time, a restriction in the airflow system will result in your dryer having to work longer to fully dry your clothes so check (and clean) the dryer vent before trying the other fixes.
Happy troubleshooting!