As an Amazon affiliate, we earn a commision from qualifying purchases.
If you’re suspecting that the cause of problems on your Maytag Bravos series washer is a fried control board, it is important to test it before ordering and installing a new electronic control board- you don’t want to go ahead with the replacement only to find that the washer won’t still work because the culprit is a different part.
Below is how to test the control board On Maytag Bravos washer (step by step)…
How to test the control board On Maytag Bravos washer (TEST #1)
Please note that this control board test applies for a few Maytag Bravos series washers including the Maytag bravos MVWX655DW0 XL washer.
However, it is important to mention that there might be slight variations in the steps for some model numbers so check your machine’s specific tech sheet to be sure.
How to test the control board On Maytag Bravos washer (step by step)
This test will check for both incoming and out-going supplies from and to the main control.
Bear in mind that this test assumes there’s proper voltage at the outlet…
- Unplug the washer or disconnect the power.
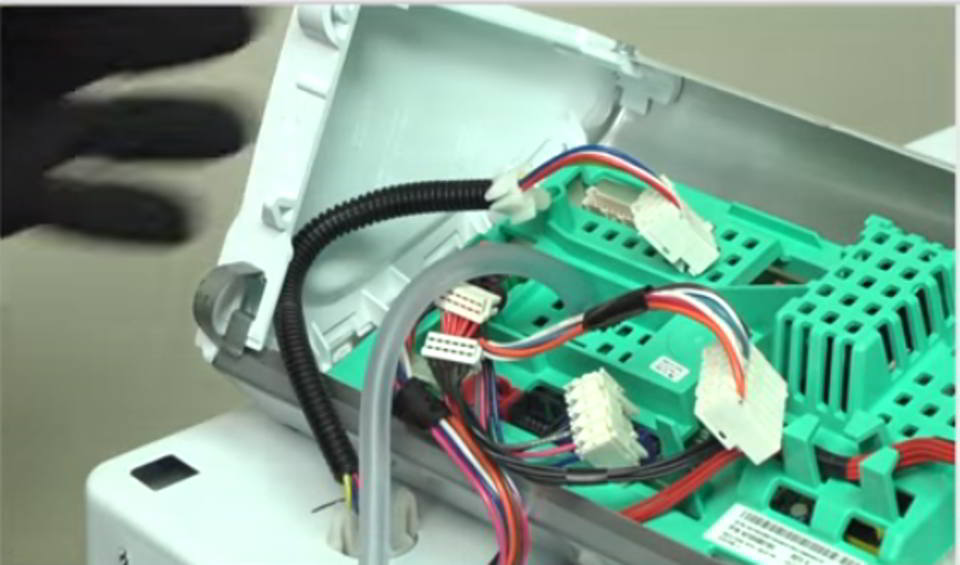
- Remove the console to access the main control.
- Verify that ALL the connectors are inserted in to the main control (all the way).
- Plug in the machine (or re-connect power).
- Grab a voltmeter then set it to AC.
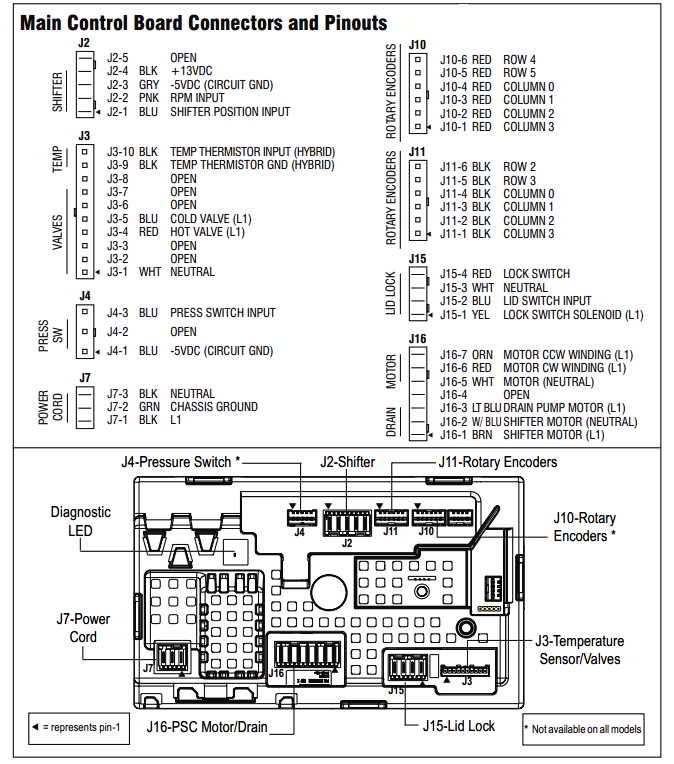
- Now connect the black probe to J7-3(Neutral) and the red probe to J7-1(L1). You want to check if 120 VAC is present. If it is present, proceed to step 7.
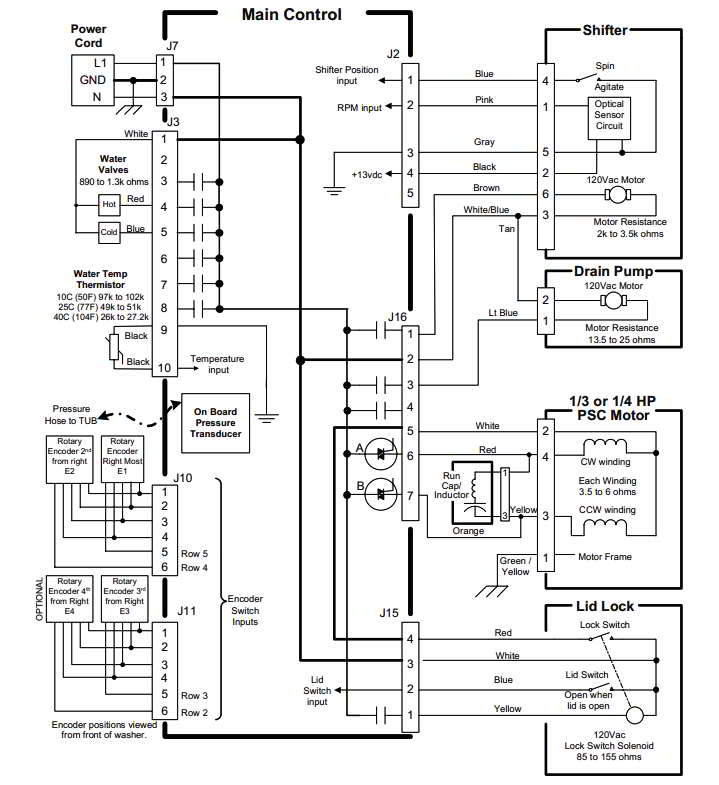
But If 120 VAC is not present, you need to check the power cord (for continuity- see figure 1 below)
Figure 1
- Is the “Diagnostic L.E.D” OFF or ON? (If you’re not sure about the LED location, See Figure 2 below)
Figure 2
If it is ON(+5VDC present) proceed to step 8. On the other hand, if it is OFF(+5VDC missing) go to step 9
- With your volt-meter set to DC, go ahead and connect the black probe to J2-3(Circuit Gnd) and the red probe to J2-4(+13VDC).
Now, if +13 VDC is present, then DC supplies to the main control are good. Else, if +13 VDC is not present, proceed to step 9.
- Check if the shifter assembly might be affecting main control’s DC supplies. Here is how:
- Unplug the appliance or disconnect power.
- Remove connector J 2 from the main control.
- Plug in your washer (or reconnect power).
- Repeat steps 7 and 8. Perform the +13 VDC presence test inside header J2 (on the board) – be careful not to short the pins together.
Now, if you are still missing one (or more) DC voltages, proceed to step 10.
Otherwise, if the previously-missing DC voltages return, go ahead and check for possible short(s) in the harness between the shifter assy and main control (and fix it).
Finally, if the harness and all connections appear good, replace the shifter assembly.
- Main control (motherboard) has malfunctioned so proceed as follows:
- Unplug the washer or just disconnect power.
- Swap out the main control.
- Reassemble all the parts and panels.
- Plug in the washer or reconnect the power.
- Calibrate the washing machine and run Automatic Test (to verify repair).
Final words
We have just shown you how to tell if Maytag Bravos washing machine control board is bad and hopefully, this will help you be more accurate when troubleshooting your washer.
Needless to say, the best solution for myriad Maytag Bravos washer control board problems is replacing the defective board.
If that’s what you want to do next (assuming you have found the part bad), you can order a manufacturer-approved Maytag Bravos washing machine control board from Amazon here.
Also, look for some videos showing how to perform a Maytag Bravos washer control board replacement on You Tube before you begin the job- they really simplify the directions for you.
ALSO READ:
Maytag Bravos washer error codes, meaning, and recommended troubleshooting


